Transmitted for your edification by Effie Cotter, Correspondent
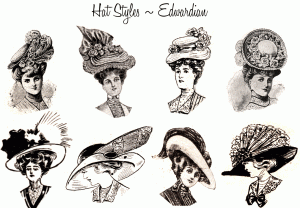 I attended the Wild Wild West Steampunk Convention this weekend, and had a magnificent time! I also took notes.
I took a lot of notes.
Over the course of the next few days, I will endeavor to organize my notes into something useful for you, Dear Reader, such that you might benefit from my wisdom.
On Friday morning, I attended the “Finicky Bits: Lost Arts Explained” workshop, which was supposed to be run by Susan Spenser, but was instead substitute-taught by Susan Holt. The curriculum covered cleaning and shaping feathers, trimming hats with ribbon and bits, fabric painting, attaching sequins, and cutting quills.
Unfortunately, there was poor lighting in the Sheriff’s office where the workshop was held, so my photos are limited in scope.
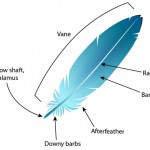 On Feathers: “Cleaning” a feather doesn’t refer to washing it, although you can do that easily enough by soaking in mild detergent and warm water. Rather, you clean a feather by removing the “downy barbs” and “afterfeather” at the base. To do this, pinch the bits you want to remove and pull down in one long motion– the barbs will strip right off. To curl a feather, use a sharp edge, such as a scissors blade, and run the feather along it swiftly, much as you would to curl a ribbon. Finally, don’t be afraid to cut your feathers into interesting and unique shapes!
 On Hats and Ribbons: Remove any ribbon that might have come with the hat– you probably don’t want it. Paint your hat with fabric paints or acrylic paints mixed with fabric paint medium. Measure out your ribbon by wrapping it around the hat and then adding a few inches. Fold the ribbon in half. Use a drop of E-6000 glue to attach the mid-point of the ribbon to the mid-back of the hat. Pin. Wrap the ribbon around, using E-6000 glue and pins to attach the ribbon to the sides. At the front, glue, wrap, and double-pin the ribbon in place. Wait 20 minutes for the glue to set but not fully cure. Remove the pins. Unless you like having pins permanently stuck through your hat. Personally, that’s not my thing, but I don’t judge anyone.
For trimming ribbon at the top of a hat, fold over the edge before gluing down to make a false seam.
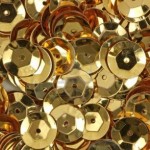 On Sequins: To add a sequin or small gears or any similar small, hard, fiddly bit to a hat, put a small drop of E-6000 glue wherever you are going to put the sequin. Put the sequin face up on the table in front of you. Hold a crayon in your hand and press it down on the sequin. Pick up the crayon– the sequin will go with it. Press the sequin down on the drop of glue. The crayon may get some glue on it– wipe it off by rubbing it on paper or canvas.
 On Quills: To cut a quill, start by curing a duck or other waterfowl feather to dry it out. Silica sand is helpful for this. Make sure the feather is very dry. It is best to fully clean the feather, to avoid having feather bits smack you in the face as you write. Unless you enjoy that sort of thing. As I said, I don’t judge. Select feather that has a long hollow bore– the part at the tip that is translucent, dears.
Using an X-Acto knife, trim off the tip of the bore. Then, use your tiny crochet hook (surely, you have one of these from beading lace, right? it’s about a .75mm hook, usually aluminum or steel) to dig out the dirt hiding inside the bore of the feather. Use the X-acto knife to cut a shallow angles cut at the end, forming a kind of “U” in the tip. Then cut a second, steeper cut in the quill tip. Slice a small split into the tip, and you are ready to write!
I loved this post! Very well-written and I am so glad that you had so much fun learning new techniques. I am in love with that glue! I mean, who doesn’t love adhesives?! 😛